

")
Washing your car at home can be both satisfactory and cost-effective. With the right tools, products, and techniques, you can get professional-level results in your driveway. But before you dive, it is necessary to follow a structured approach.
This DIY car wash checklist ensures that you do not miss a step during the procedure or damage your vehicle. Whether you are a first-timer or looking to refine your routine, this blog has you covered with a car wash preparation tool and pro tips to increase your cleaning game.
Step-by-Step Procedure for DIY Car Wash at Home
Let’s start with your full car wash preparation guide – because your car is entitled to a showroom finish at home, too!
Step 1: Collect all the necessary equipment and product
Preparing your equipment and product is the foundation of a successful car wash. Without the right gear, you risk scratching your paint or leaving the lines behind. Let’s break down properly what you need to wash your car at home.
This first step ensures efficiency, saves time, and helps you avoid mid-wash. Due to everything in hand, the wastage of water decreases, and the overall result improves. In addition, using the right equipment means less effort and better protection for the exterior of your car.
Here are the tools for a car wash at home :
- Two buckets: For soapy water, for rinsing.
- Microfiber Wash Mitts: Gentler on your car surface compared to a sponge.
- PH-Balanded Car Shampoo: Avoid dish soap-it strips wax and damages the paint
- Wheel and tire brushes: Designed to eliminate dirt from wheels without harm.
- Grit guards: Stop your glove from recontaminating.
- Drying towels: Use premium microfiber drying towels or chamois.
- Glass cleaner: For spotless windows and windshields.
- Tire shine or dressing: Enhances appearance and shields the rubber from.
- Detail spray: Improves shine and clears little spots.
Pro Tip: Before beginning, always double-check your list. Missing one item may throw the whole daily schedule off.
Step 2: Select Appropriate Time and Location
Your wash quality may be influenced by timing and place, even if every tool is available. Too fast drying of soap and water can cause streaks and water spots as well. You need an atmosphere that helps you, not one against you.
Though this phase seems small, it greatly helps to achieve a polished finish. Your paintwork is ideally protected from fast drying by shaded driveways or covered locations. Think also about the temperature; lukewarm water works best in temperate climates.
Also Read: Do You Need a Car Inspection in Georgia? Simple Answer Inside
Choose the proper wash location by taking these factors into account:
- Choose a shaded area or early morning/evening wash to avoid water stains.
- Make sure the runoff does not pool by providing appropriate drainage.
- Steer clear of windy circumstances that could blow dirt back onto your vehicle.
- Nearby, have a hose or pressure washer available.
Selecting the ideal location and time improves your final result and increases efficiency; little touches that raise your whole DIY car wash checklist.
Step 3: Wash completely before using soap.
Though it sounds obvious, many people disregard the automobile’s rinsing before soaping. This prewash eliminates loose soil, which might otherwise scratch your paint during washing. Before any kind of cleaning may start, a fresh slate is imperative.
Particularly if your car has accumulated dirt or dust, skipping this stage might cause paint damage or swirl marks. A strong rinse may remove a lot of dirt and cut down on your cleaning effort. Your initial visual inspection starting point is also it.
Here’s how you can do it successfully:
- To maximize coverage, employ a pressure washer or a hose with a spray nozzle.
- Begin from the top and descend, as dirt descends,
- For a complete clean, don’t forget the wheel wells and undercarriage for a thorough clean.
- Allow the water to run freely to wash out hidden debris.
- Early elimination of pollutants helps to ready the surface of your vehicle for secure cleaning.
Also Read: Gas Prices Are Rising What You Need to Know This April
Step 4: Wash Using the Two-Bucket Method
Your best buddy when it comes time to use soap is the two-bucket method. It keeps dirt from being brought back to the surface of your automobile, thereby minimizing scratches and swirl marks. Every professional’s car wash preparation guide includes this as a major component.
Dipping your best car shampoo or mitt into unclean water undoes all your work. The clean rinse bucket removes pollutants, hence protecting your wash mitt for usage. View it as washing your cleaning tool.
The two-bucket approach works like this:
- One bucket has soapy water; the other has clean water with a grit guard.
- Wash a portion, dip your mitt in the soapy pail, then rinse in clean water.
- Before lowering the mitt back into the soapy bucket, squeeze it well.
- Work in sections, such as roof, windows, doors, hood, trunk, then bumpers.
Essential on your diy car wash checklist, this method protects your car’s paint and lengthens the life of your tools.
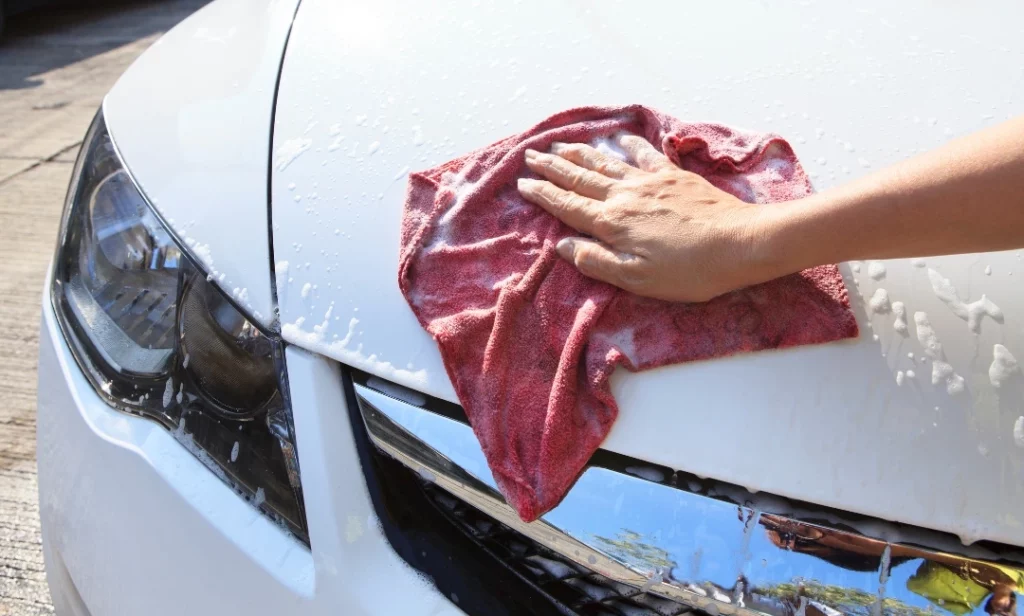
Step 5: Rinse and Dry Carefully
Once you have completely washed your car, the next step is to rinse all the soap. A poor rinse will leave residue, thereby degrading your car’s brilliance. And an incorrect drying method can undo all your labor.
This is the phase at which water spots often develop. To avoid them, quick and thorough drying is essential. Letting your car air dry is not the best; dirt and trash may adhere to the wet surface once more.
Follow these suggestions for a flawless final product:
- Thoroughly rinse the whole vehicle once from top to bottom.
- Drying should never be air drying; instead, use a big microfiber towel or chamois cloth.
- Blot rather than dragging the towel to avoid streaks or marks.
- A leaf blower or air compressor will help with water trapped in mirrors or trims.
The difference between a good wash and a great one is a clean, dry finish; so do not haste this step
Step 6: Apply Finishing Touches
Now that you’ve washed, rinsed, and dried, it’s time to give your car those last touches to make it shine. Although not required, these extras raise your house wash to professional grade.
These procedures elevate your home wash to professional standards, whether you are cleaning the inside or shining your tyres. Furthermore, using protectants can help to enhance the longevity and look of your car over time.
Here are some last thoughts you might consider:
- For a deep black, glossy finish, use tire dressing.
- To achieve a crystal-clear vision, use glass cleaner on all mirrors and windows.
- Adding more shine and paint protection is a fast spray wax or detailing spray.
- If necessary, vacuum and clean indoor surfaces. Finish the work.
These measures will make your car look freshly detailed, not only spotless.
Final Thoughts
All you need to wash your automobile at home is the right mindset, technique, and materials, not an elaborate rig. Following this do-it-yourself car wash checklist guarantees not just a clean vehicle but also one that is preserved and protected.
From getting the correct tools for car washing at home to mastering the technique of careful drying and detailing, you now have the whole roadmap. No more expenditure at drive-thru car washes or fretting over paint damage.
So next weekend, get your equipment and transform your drive into a car spa. Your wallet and car will show gratitude.
Must Read: Easter Jeep Safari Leads To Rolling Out Of 7 Innovative Off-Road Concepts.
FAQ’s
Q1. Can I wash my vehicle using home items such as dish soap?
It’s generally discouraged. Dish soap can damage your paint and strip protective wax coatings, as it is very harsh. Always use a pH-balanced car shampoo created specifically for vehicles to guarantee safety and effectiveness.
Q2. How often should I give my vehicle a DIY car wash at home?
Once every two weeks is best for regular usage. Driving through coastal or muddy areas calls for extra washing to stop salt or dirt from accumulating and damaging your car’s paint.
Q3. Is it okay to utilize a pressure washer on the paint of my car?
Yes, but with care. To prevent chipping paint or destroying sensitive trim and seals, use a pressure washer with a fan nozzle at low pressure (under 2000 PSI) and keep a safe distance.
Q4. Why should microfiber towels be used instead of traditional towels?
Microfiber towels are highly absorbent and gentle to your car’s surface, lowering the risk of scratches. They trap more , and leave fewer streaks so making them necessary for detailing and drying.


